Premiere Pro:
|
|
"House of The Beast" is a short horror trailer/movie orbiting around a monster attacking the inhabitants of a house. I got the idea after my cat, Fred, violently attacked me and completley disembowled me (Im kidding he's incredibly bad at fighting me). I pitched the idea to my computer modeling teacher, who approved, and began filming with my dad, sister, and my cats. Those who have never had a cat, let alone two, and a younger sister have never experienced how incredibly tiring it is to film stuff, but It was fortunatley done. Once the clips were in Premier Pro, I began to sequence them and chose a music track for the video, which I had to cut several times to get parts I wanted. I used lots of the Constant Power effect, which would have been way more useful to know about several videos ago. Halfway through making the video, I had to cut half the movie (Including the ketchup scene; my sister was not happy about that) since it was too long. After that little hiccup, I began putting in sound effects, such as the running sounds you hear. I had to go through most of the clips' soundtracks to find glitches in the noise, which is super annoying, especially if it takes up the whole class period. And dont get me started on getting a soundtrack for the first part of the video, which was probably the hardest part of the entire video. I wanted to go with a Fallout Apocalypse kind of theme, with the super old music in the radio, just to make it unnerving, but I couldnt find anything so I settled with something that wasnt bad but I didint totally love. All in all, this was probably my favorite project to work on since I had a lot of freedom on it. Im not completley satisfied with what I made, but I think its decent enough to be turned in (Thats not a really good sales pitch I just judge stuff I make pretty harshly.) With that said, I might look into video and filming for one of my careers, since it did interest me and I had a lot of fun.
Adobe Illustrator:
|
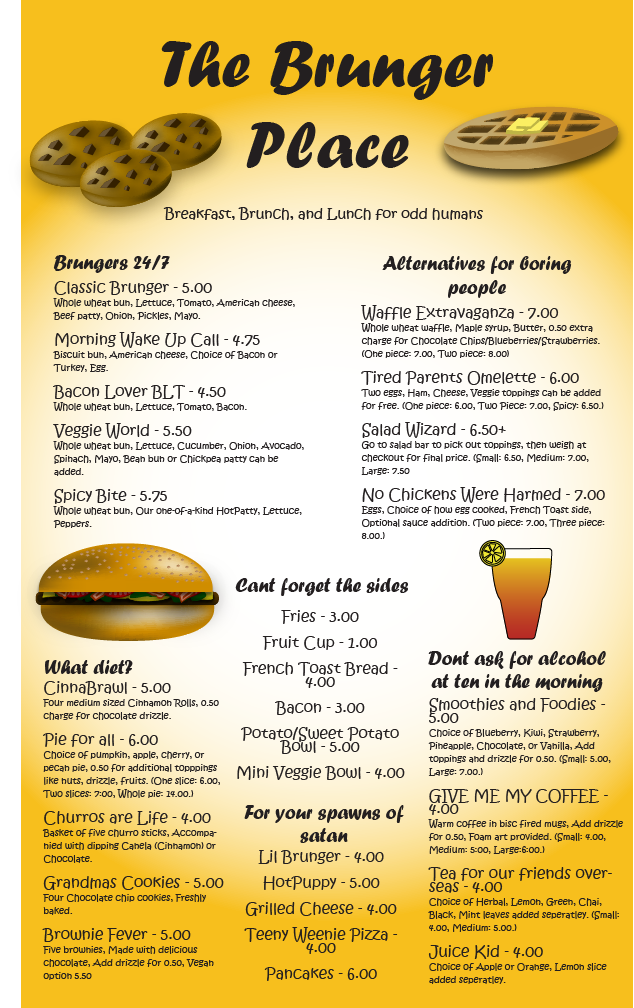
Menu Project - The Brunger PlaceThis assingment helped us not only create interesting graphics, but it teached us how to organize and design something like a menu or a pamphlet. It started out with a tutorial on making the cheeseburger, which you can see here on the left in the middle. I was taught how to use the mesh tool to create shadows on my shapes, as well as being taught how apply drop shadow. I learned how to group things and turn things into symbols that are easily acsessible. We were then instructed to create additional graphics (I chose cookies, a waffle, and a drink), and design a menu with food items of our choice. My imaginary restaurant is called The Brunger Place, and it serves burgers which we call Brungers. I wanted sort of a goofy tone to my menu, so that is why I chose mostly warm colors for my graphics and background. Thefonts I used were Kristen ITC for the smaller text, and Forte for the headings. It originally took me a very long time to find fonts I wanted, but I am pretty satisfied with my choice.
|
Other Work:
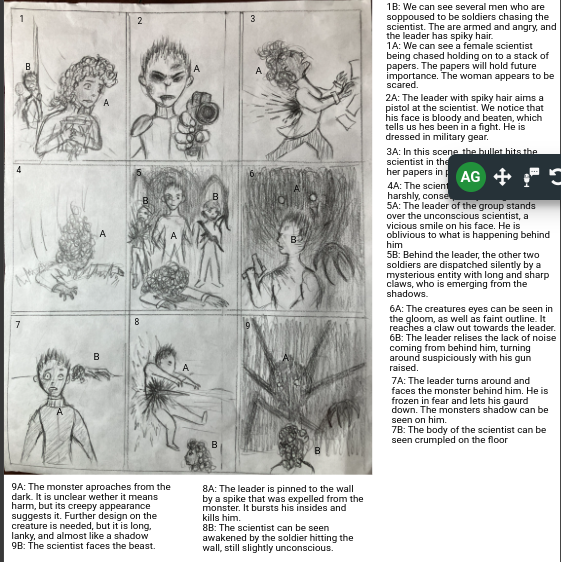
Storyboarding ProjectThis storyboard mostly focuses on is the soldier who is trying to kill the scientist, and we see how his power fluctuates throughout the scene. At first, the soldier is attempting to catch the scientist, and eventually succeeds in capturing her. He is so preoccupied with his victory that he does not notice the monster sneaking up behind him, and eventually it results in his death. The last panel diverts the focus back to the monster, and cuts off just as the story begins to introduce the scientist character. Whilst drawing this story, I really had to think about the pacing of the scene, and at multiple times I was not happy and felt that I was missing a step. However, I eventually decided on this and im pretty satisfied. I wanted to focus on the scientist character at the beggining, but it eventually evolved into tapping into the soldiers final moments. I enjoyed this project because it gave me an excuse to draw, and I feel like I learned even more on how to be a good author.
|
|
Photoshop:
Character Sketch Project
This character is one of my older characters that I decided to revist for this project. She originally was an angel kind of being that was a very kind and compassionate character, adverse to dark magic, but after being brutally betrayed by her friends, she joined a cult that specialized in the dark arts. Her wings having been cut off, she regrew new demon wings and horns, and has become a master dark mage. She has the ability to summon undead creatures and demons and is currently planning a full scale invasion on the kingdom that betrayed her. She has violent tendencies, hallucinations, dangerous nightmares, and is often incredibly unpredictable. Her cooking is still exceptional, although she chooses more grim designs for her platters. In animation or film, this character would mostly be a side antagonist that can very quickly change the flow of the story, so basically a wild card. Her color pallete, red, orange, and purple, are meant to signify danger and strong mythical abilities. Her careless but vicious stance in the first picture demonstrate her aloof nature concerning death, and the second picture demonstrating her hidden violence.
|

|
|
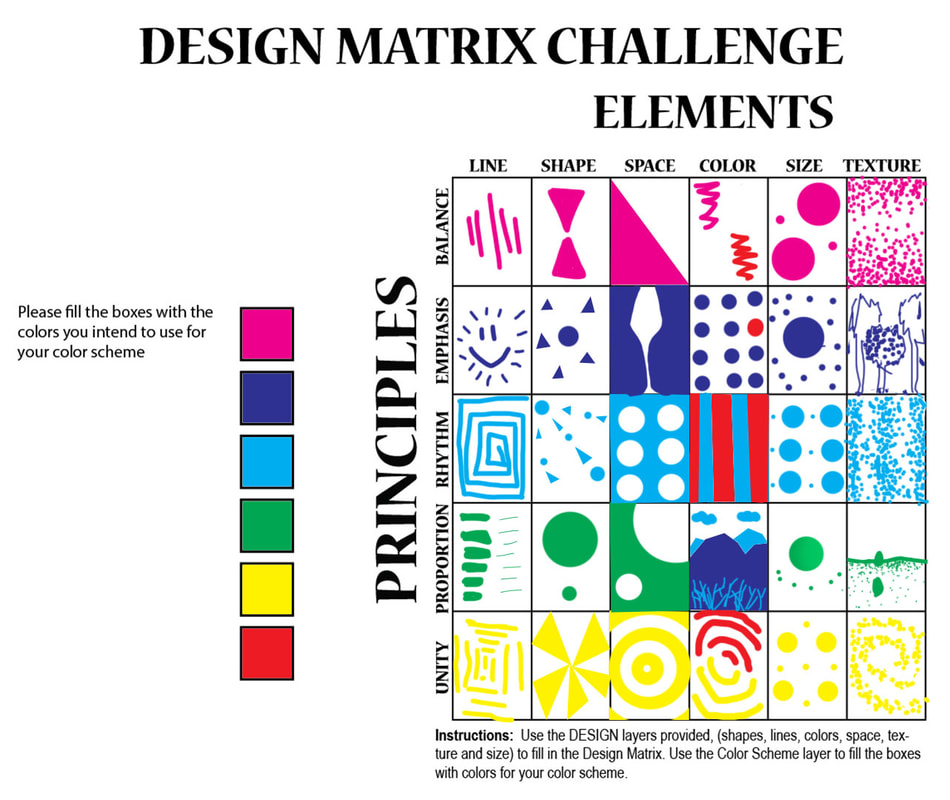
Design Matrix ChallengeThis assingment made me really think what all the elements and principles of art, and I eventually realized my perceptions of these might not be what I think. Some boxes were easy and straightforward to complete, but others, like color and proportion, took me a lot longer to complete. This project has tought me that I have a lot yet to learn, and that the elements of art are just as simple as they are complicated. Throughout the project, I often gave up a lot from frustration and didint put my whole effort into some boxes. Many times I went back the next day and found that some of the designs I didint like, so I had to change them all over again. And dont get me started on accidently drawing on other layers. Overall, this assingment was humbling if a little annoying, but I did enjoy it.
|
|
Masking PBMIn this activity we went over layer masking. Layer masking is a non destructive way to hide things we dont want in a picture. Clicking the layer mask button underneath the layers tab with a selection causes everything that is not selected to be blocked out. If you regret your decisions, you can always edit the layer mask with a white brush or delete the layer mask. This activity helped me do layer masking a lot faster and taught me how to do it with selections. In other activities we mostly used the paintbrush for masking, but I think I now know a way to work smarter. I also added some text elements because I felt that my work was a little empty.
|
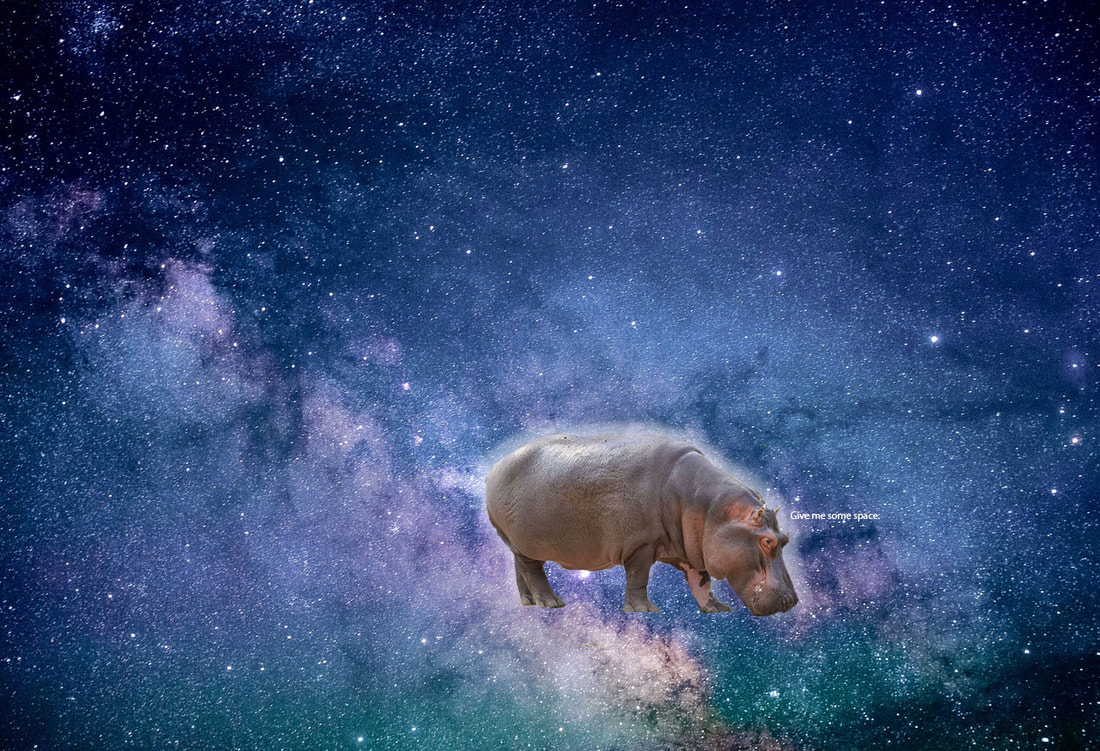
Vignette PBMIn this activity I learned how to use feathering so things can fade into my image, like the cat is fading into the cereal background. I thought these pictures would be a funny combination when it comes to fading out things. I dont think I completley figured out how to use feathering, but with a little help from masking I was able to turn it into something I wanted. In previous activities in photoshop, we usually just used masking to cut our picture, but we never made it fit into the image using a fade, and this taught me that. I think I now have a bigger understanding on how selections work and what buttons to press so the picture does the thing I want it to do.
|
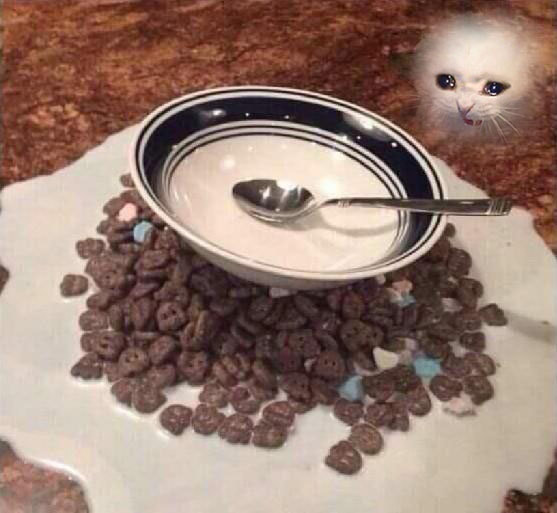
The cereal image is not mine, someone posted this on reddit but I cant get in to figure out who because the school blocked the website.
|
3d Modeling:
Four Corners Scene Lights
|
This was probably one of the hardest assingments ive had to do. This is due not becuase of the content displayed, but how long it takes to complete. Often times I had to step away from this assingment because of how frustrated I was getting, which is why it is being turned in now instead of earlier this year. However, this assingment taught me several essential skills when it comes to 3d scene modeling. First, lights can change the mood and composition of the scene completley if you know how to use them correctly. In this assingment, we were instructed to use four types, one type for the headlights, another for the suns rays, one for the sun itself, and one for the moonlight. Once they were added together with the appropiate parameters, they created a more realistic scene than just using the default 3ds light. Another thing I learned was how to place and position cameras. I personally had a lot of fun placing these, and once I realized I could look through the camera's perspective, it was smooth sailing. Once all the objects were placed, I began to render the animations very slooowly, and now here I am. I enjoyed this project even if it was tiring at times and hope to use these skills in the future.
|
|
Completed four corners scene.
|
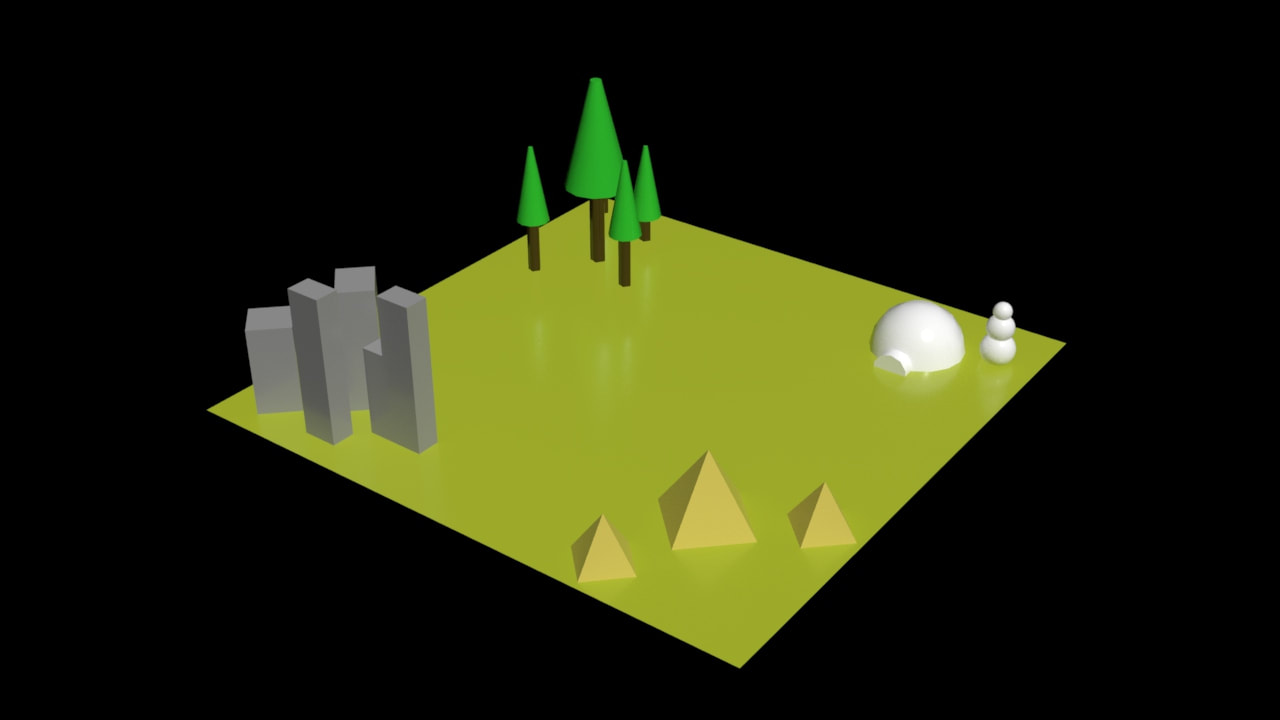
Four Corners Scene PBMUsing basic primitives can be really simple, but are the principal building blocks in computer modeling. This is an example of an incredibly basic scene where we just used Rotate and Move to edit the objects into the position we want them. This may not look like much, but with more tweaking with modifiers and maybe a little surface modeling, the scene might transform into something more life-like. You really needed to pay attention to the numbers on the instructions because it was easy to mix them up and accidentally organize your primitives the wrong way. When rotating the entrance for the igloo, you had to type in the numbers a certain order, becuase rotating the cylinder would position it wrong. However, as long as you followed instructions, the assingment is very easy.
|
Nut and Bolt/Wineglass/Chess piece PBM
|
|
I began this project by reviewing the tutorials my teacher had posted. I thought this would be hard at first, but I quickly began to understand how to use boolean and modifiers. What I liked about this project is that it taught me new techniques I can use in later models, like the twist that can be used if I want to make something look like a screw. The most difficul parts was locating all the little buttons I needed to click so the models turned out how I wanted them. I used the earlier skill of converting an AVI file to MP4 to meet the project requirements, as well as pretty easily rendering images.I think I will use boolean in the future, as well as play around with modifiers at some point. This project also tought me how to use splines, so I think I will be using more of that soon. This leasson would be better if more modifiers were included, but it was a very good and informative lesson, and I had fun with it.
|
